Sew Fun: Nursery Bedding & Blankets

Tuesday, December 01, 2015

I have had these sew fun projects done for months, but have not blogged about it! The pictures kind of got lost in all of the galleries and folders from the past several months and I just stumbled upon it last night! Its crazy when I look at them now and how much the nursery has changed since taking these photos!! Anyway, here goes nothing. 

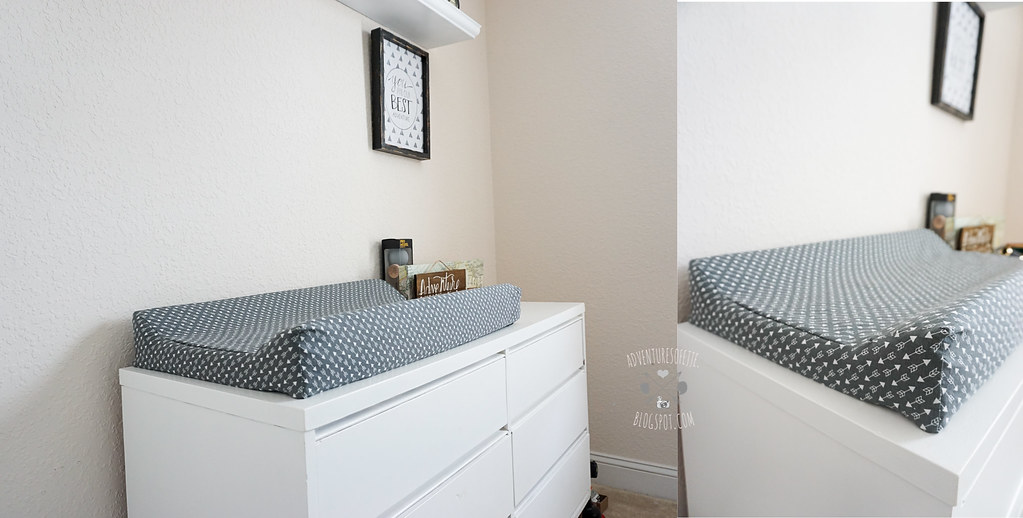
1. Changing Pad Cover -

For those that have followed my blog, you guys would know I did a totally different one months ago. Well a week later I wasn't too in-love with it, so I went out and bought new fabric (on sale of course!). I was so excited when I found this pattern because it was perfect for what we were going for! I also changed up the pattern. I cant remember where I found the original tutorial I followed, but this one is more fitted for the contour pad and actually fits the shape of it. It was a little more complicating than the first one I made, but I love the turn out a lot better! I completed this back in late August!

Untitled

Materials Used

1 Yard Fabric - Joann's (was marked at 40% off at that time) 
Sewing Machine
Matching Thread
1/4 inch Elastic (i cant remember how long I cut, but I bought the packaged ones)
Cutting mat, rotary scissors
Measuring Tape

Like I said I cant remember where I found the original tutorial that I followed, but you can find the similar one here. Saves me time on showing the steps I did, since its been so long so Im drawing a blank! I always pre-wash all of my fabrics before getting started on actually making them. 


2. Crib Mattress Cover & Skirt -

I was originally going to purchase a set from this small business from Australia, but when she quoted me $360 and all the ones I found on Etsy were also on the high price! We set a budget for this nursery and I had to make sure I stuck to it! So I just had to pass it up! Which gave me the idea to do them on my own! I love being able to make them myself because I have complete control of what the design and color I want. I bought the skirt the same day I bought the changing pad cover fabric, so it was on sale as well. It came from the same set/designer. I was so happy when I found them! I remember I was ready to give up and just go, and if I hadn't looked down, I wouldn't have spotted them! Now I regret not getting more yardage because I went back weeks later and they were sold out on both designs! They did have other colors like black, navy, mint, pink. 

Untitled

The crib mattress tutorial was the same tutorial I did for the original changing pad cover I made, except I changed the yardage size! Click here for tutorial. Since the crib is a tad bit bigger, the cuts for this is 44" wide x 69" in length. The rest of the step is similar. I always pre-wash all of my fabrics before getting started on actually making them. 

Materials Used:

2 yards of  44-45" wide cotton fabric (I cant remember the name of the color! But it was on sale for 30% off at that time)
2 yards of 1/4 inch Elastic (I cant remember the exact measurement I actually used, I believe it was 60")
Saftey Pins
Cutting Mat and rotary scissors
Sewing Machine and matching thread
Measuring tape

Im sorry if these aren't as detailed as I normally would do them, but as Ive mentioned these have been done since late August or early September that I can't seem to remember the steps I did and I, for some reason, didn't take any photos of the progress! Ooops! Im sure you can find tutorials on the internet! :)

3. Crib Skirt -

I didnt follow any tutorial for this and kind of made things up as I went! Haha! I figured it wasnt going to be too hard! It was just straight fabric to cover the bottom part of the crib! So I measured the long and short sides of the crib and went to the store. I bought 2 yards of the fabric and just cut the measurements according to what I measured on the crib. I believe the long side is 55" long and 10" wide. The short side is 26" long and 10" wide. I used fabric tape (the iron one ones) to put them together as I was too lazy to sew that day! I attached them to the crib via clips and put the mattress back on top! Tada! :]

4. Baby Blankets -

These blankets took about a month on and off to complete because I went back and forth on how I wanted the designs to be and one of them, my sister and I collaborated together! I also had to wait til my fabrics were printed and delivered to me before even getting started! These are custom designed and printed on Kona Cotton fabric, and then I sewed it on minky fabric and a sweater type fabric. I loved how they turned out!! Again, I saw these going for $50+ on small shops on Instagram, so I found a way to make them work for me! I spent roughly $45 for both blankets, most of the costs went to printing, and then I purchased the back side of the fabrics from Joann's using coupons. 

Untitled

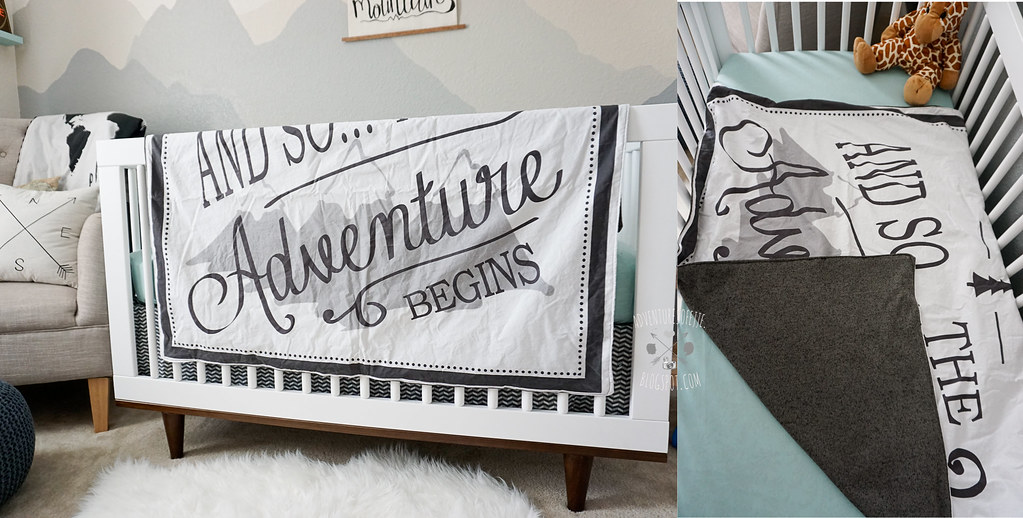
This one was a collaboration. I had asked my sister to come up with the main design for me, we went back and forth for weeks because I couldn't make up my mind! But I am completely happy with the final result! Instead of using a minky fabric for the back side, I ended up going back to Joanns and getting a different fabric for the back because John wanted something grey for this one and I only had a white minky fabric left. Luckily I went ahead and looked for a new one because I found the perfect one for it! Its a soft sweater type fabric, definitely cozy! This will be one of the blankets we bring to the hospital. 

Untitled

This blanket was designed by me using Photoshop CC. I had about 7 different rough drafts before John and I finally decided on which one to get printed. I stuck with monochrome for this to give it a more classic and clean look. I had to search high and low for different brushed fonts and the perfect world map to turn it into this design, but it was worth it! I didnt follow any tutorials for this and just went in blind. I had to test out how I was going to do it on other fabrics before making these because there was no room for mess ups because the front fabrics are custom made and if I screwed up, Id have to order a whole new one! 
Materials Used:

1 Yard of personalized/printed Kona Fabric (for each design)
1 Yard each of Black Minky Fabric & a Sweater cotton fabric (had a 60% off coupon)
Matching thread
Sewing Machine
Cutting Mat and rotary Scissors
Saftey Pins (tons of them!)

** Bare with me as I try and remember the steps.

Step 1 - Match the front and back fabric and cut accordingly. I cant remember the exact measurements of our blanket after it was cut, but its definitely less than a yard! Make sure you give yourself an extra half an inch for where you have to sew. 

Step 2: Face the fabrics right side down (because you will sew it inside out and then turn it right side up after youre done sewing all corners) and pin along the edges! I used a ton of safety pin because Minky fabric is super stretchy!

Step 3: When sewing make sure you leave at least a 5" opening so that you can turn the fabric inside out to finish it off. Sew along the edges, follow the pins. Sewing minky fabric was a bit tricky because its so stretchy and I dont have a walking foot on my machine. 

Step 4: When youre all done sewing the edges, used the 5" opening to turn it right side out and sew along the edges again to finish it off and voila! 


I know I took photos of my progress, but I honestly don't know where it went! =\ But I hope this helps for anyone considering making their own things for the baby's nursery! We're big diy-ers, so we have made or repurposed majority of the things in the nursery ourselves (as well as most of the things in our house, lol!). Ive said this tons of times before, but its just so rewarding when completing a project!


Xx,
Jenn

You Might Also Like

0 comments