
Sew Fun: Robes & Kimonos!
Saturday, October 24, 2015
Ever have trouble finding a nice comfy robe in the print you like that isn't pricey? Not I! I love wearing robes, mainly in the winter time because most of the robes I have are the thick, fleeced ones, which is too hot to wear any other time of the year! Plus, with labor and delivery nearing, I have been on a hunt for a nice comfy robe. Every time I went to the store, all I found were the thick fleece ones, which I have 3 of already, and when I do find the thin soft cotton ones, they don't have my size or its a little pricier than I'd like! So, I got my creative juices going and pulled out one of my robes and a kimono I was thinking of turning into a robe to see if I can imitate it, and went to the fabric store. I went straight to the clearance and sale section because I didn't want to spend too much since I was experimenting and wasn't sure how it was going to turn out yet.
Paisley - Sheer fabric
Purple Long Sleeve - Cotton and Poly blend
Polka Dots - Silk
Paisley - Sheer fabric
Purple Long Sleeve - Cotton and Poly blend
Polka Dots - Silk
Materials Used:
- 1.5 yards of each of the fabric (if you wanna just make a Kimono you can get away with using just 1 yard, but I wanted to be safe than sorry) - Prices Varied
- Rotary Cutter or Scissors
- Measuring Tape
- Cutting Board
- Pins
- Sewing Machine
- Matching Thread
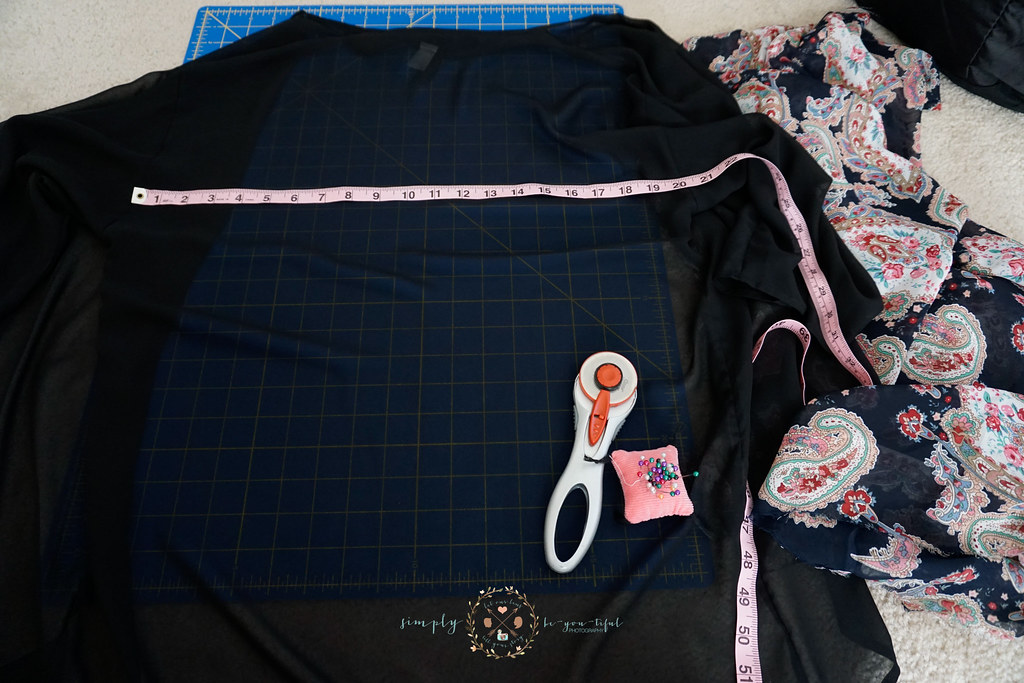

Step 1 (box 1) - I used the measurements that I got from measuring my old Kimono and added a few inches to the width since I have to consider it being wrapped around this big 'ol belly of mine and I just wanted it to bit a little more loose. Measurements I did for the back piece is 27.5 width x 36 in length (since I wanted it to reach my knees). I then cut out two more rectangle pieces, 10in x 26 for the arm pieces and folded it in half, hamburger style.
** Now for the long sleeve it was a little trickier. I can't remember what the exact measurement was because I wanted it skinny towards my wrist area, so I trimmed it at an angle. I know I started off with 17in x 22 in, cuz this one was folded hotdog style. I measured from my shoulders to my wrist and added .5 in because I know I had to hem the end.
Step 2 (box 2): I cut two more rectangles measuring 12in x 36in for the front of my robe (I wanted it even with the back part. But if you're making a Kimono you can change the length to 30in or however the length you want it to be so that the front is shorter). I put the front and arm pieces aside.
Step 3 (box 3): I got the back piece and folded it in half (long ways) and cut a curve on the corners for the neck.
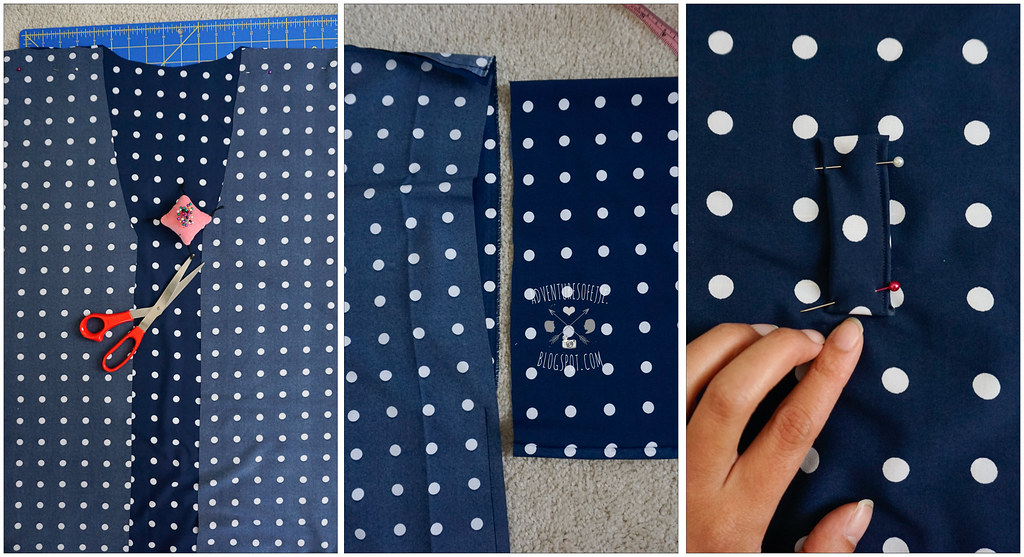
Step 4: I put the front pieces on top of the back piece with the right sides facing each other and then pinned them. At first I looked at and something was off cuz It looked odd, so I cut sort of a V shape from the front pieces so that it wasn't just a straight opening. I started the cut from the armpit area all the way to where the neck line ended (see picture above). Then I got to sewing. I sewed the sides and the top edges where the pins are. When you sew, make sure that you leave an opening for for your sleeves. Mine was a 13 in opening, so that you can slip the sleeves in later.
Step 5: Since I was making a robe, I added a little loop in the back piece of the robe so I can put the straps in. I put it on the center of the back pieces starting just below the armpit part. Make sure its centered. You can also add loops to the sides instead if you prefer it that way, it was just easier to do it in the back so I'd only have to do one. Pin & sew. Now you should have the back, front and loop pieces sewed together and only have the sleeves left to sew.
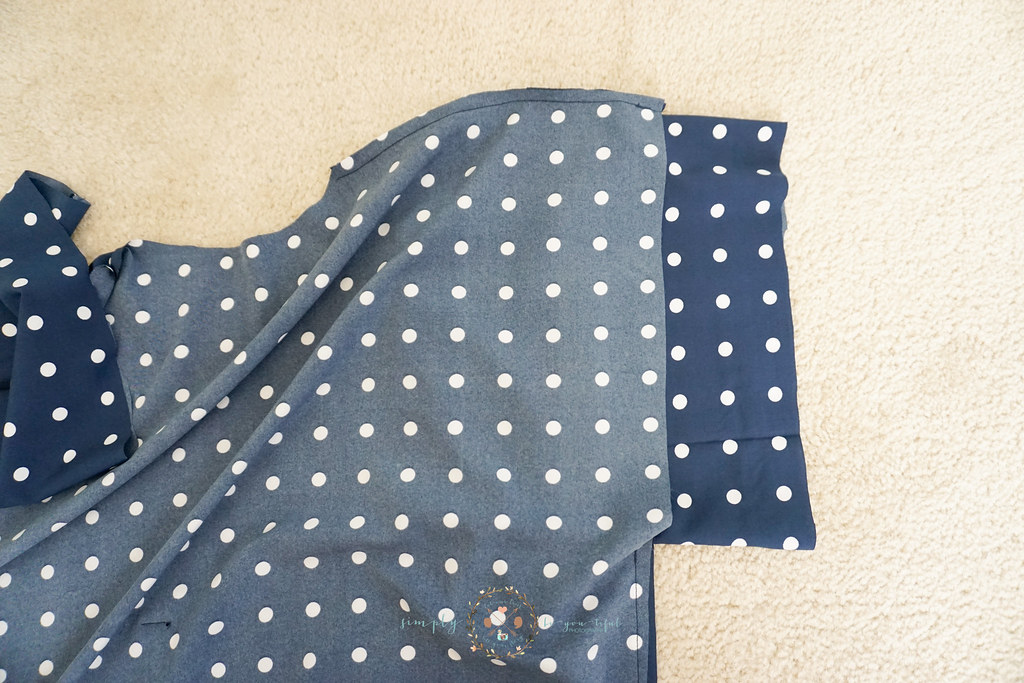
Step 6: Sew the opening edges of the arm pieces together where you folded. Slip the sleeve in the opening and then pin & sew around the edges, do the same for the other side. I had already hemmed the edges of the sleeves prior to finishing this part.
Step 7: Finish the strap by folding it in half (long ways) and do a straight stitch. Tada! All done, you have your self a robe or a kimono! Now I just need to figure out how to add pockets! Ha!
Total Cost for all three: ~ $24.00 (vs. $24 for one from Target).
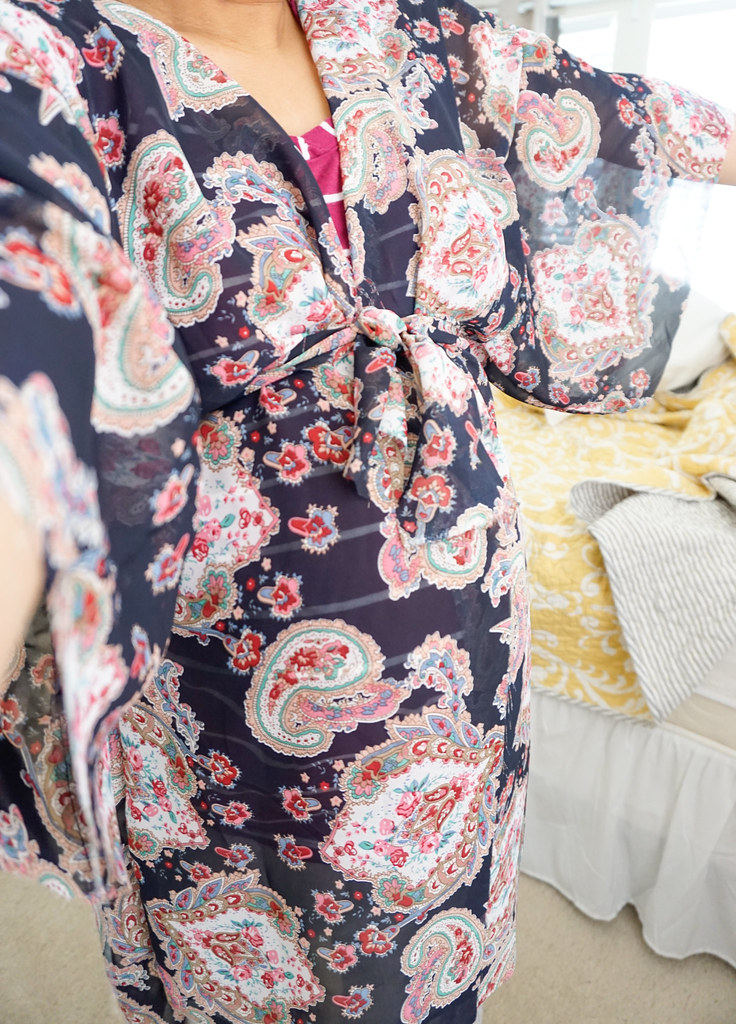
Thats me trying it on after I made it. John wasn't home to take the picture so I had to do a quick selfie! It took me about 4 hours to do all three only because I sat there for a good 30-40 minutes trying to figure out measurements and how I was going to start it and also took a few breaks in between. I started it at around 8:30 and finished just in time for lunch! But it shouldn't take no more than 45 minutes to do or even an hour at the most. I just get distracted easily! Haha! Overall, I love it and was so proud of them when I finished! Im starting to step out of my comfort zone now and actually trying to make apparels. First the dress, now the robes. John is pretty impressed too. He asked me to make him a bathrobe to use for when he gets out of the shower, but the Terry Cloth material for that is pretty expensive and he's taller so Id have to get more yardage. So I said if I cant find him a robe that cost less than $40, i'll make it for him. You should try it, it's pretty easy! :)
Xx,
Jenn


0 comments